Storage Management
Storage management provides network-shared storage that can be mounted to different instances for data sharing between instances. It supports multi-point read and write access and is not affected by the release of any instance. Additionally, the storage backend maintains multiple redundant copies, ensuring high data reliability (unlike local data disks, which lack redundancy and may experience disk failures that could affect data).
Add Storage
Navigate to the GPU Instance page, click on a specific instance, and under Storage, you can add storage and specify the path where the storage will be mounted in the instance. Once confirmed, the storage will be accessible through the specified mount path within the instance.
Shared Storage
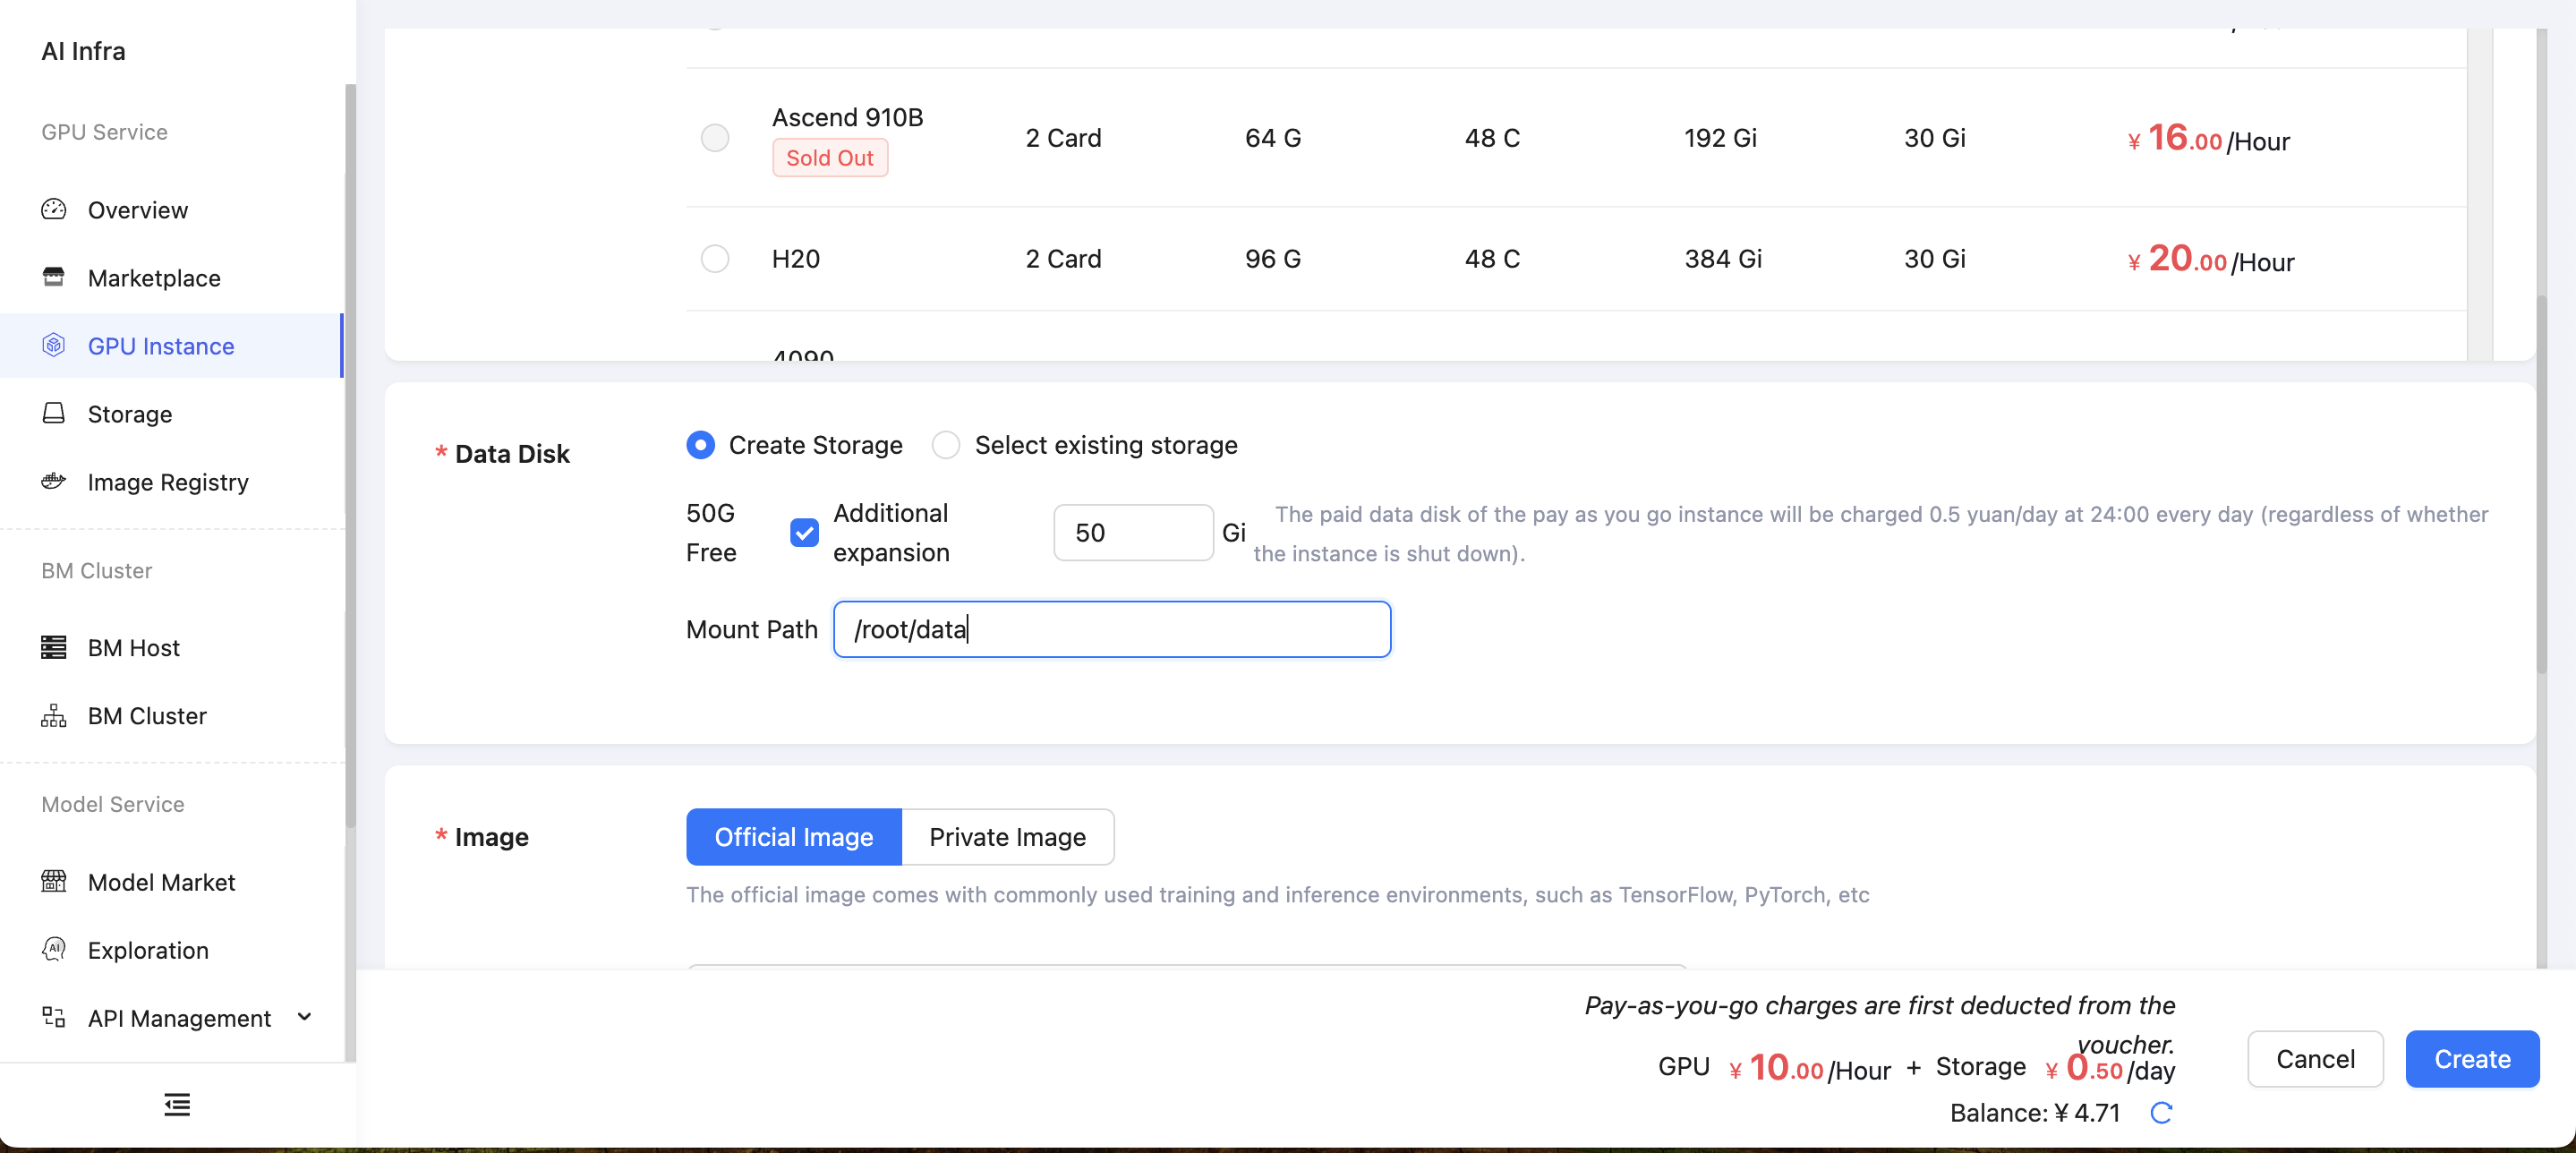
Go to the GPU Instance page, click Create Instance, select the existing storage for the data disk, and choose the default mount path /root/data. This will allow you to use the data disk of the target storage.
Upload Files
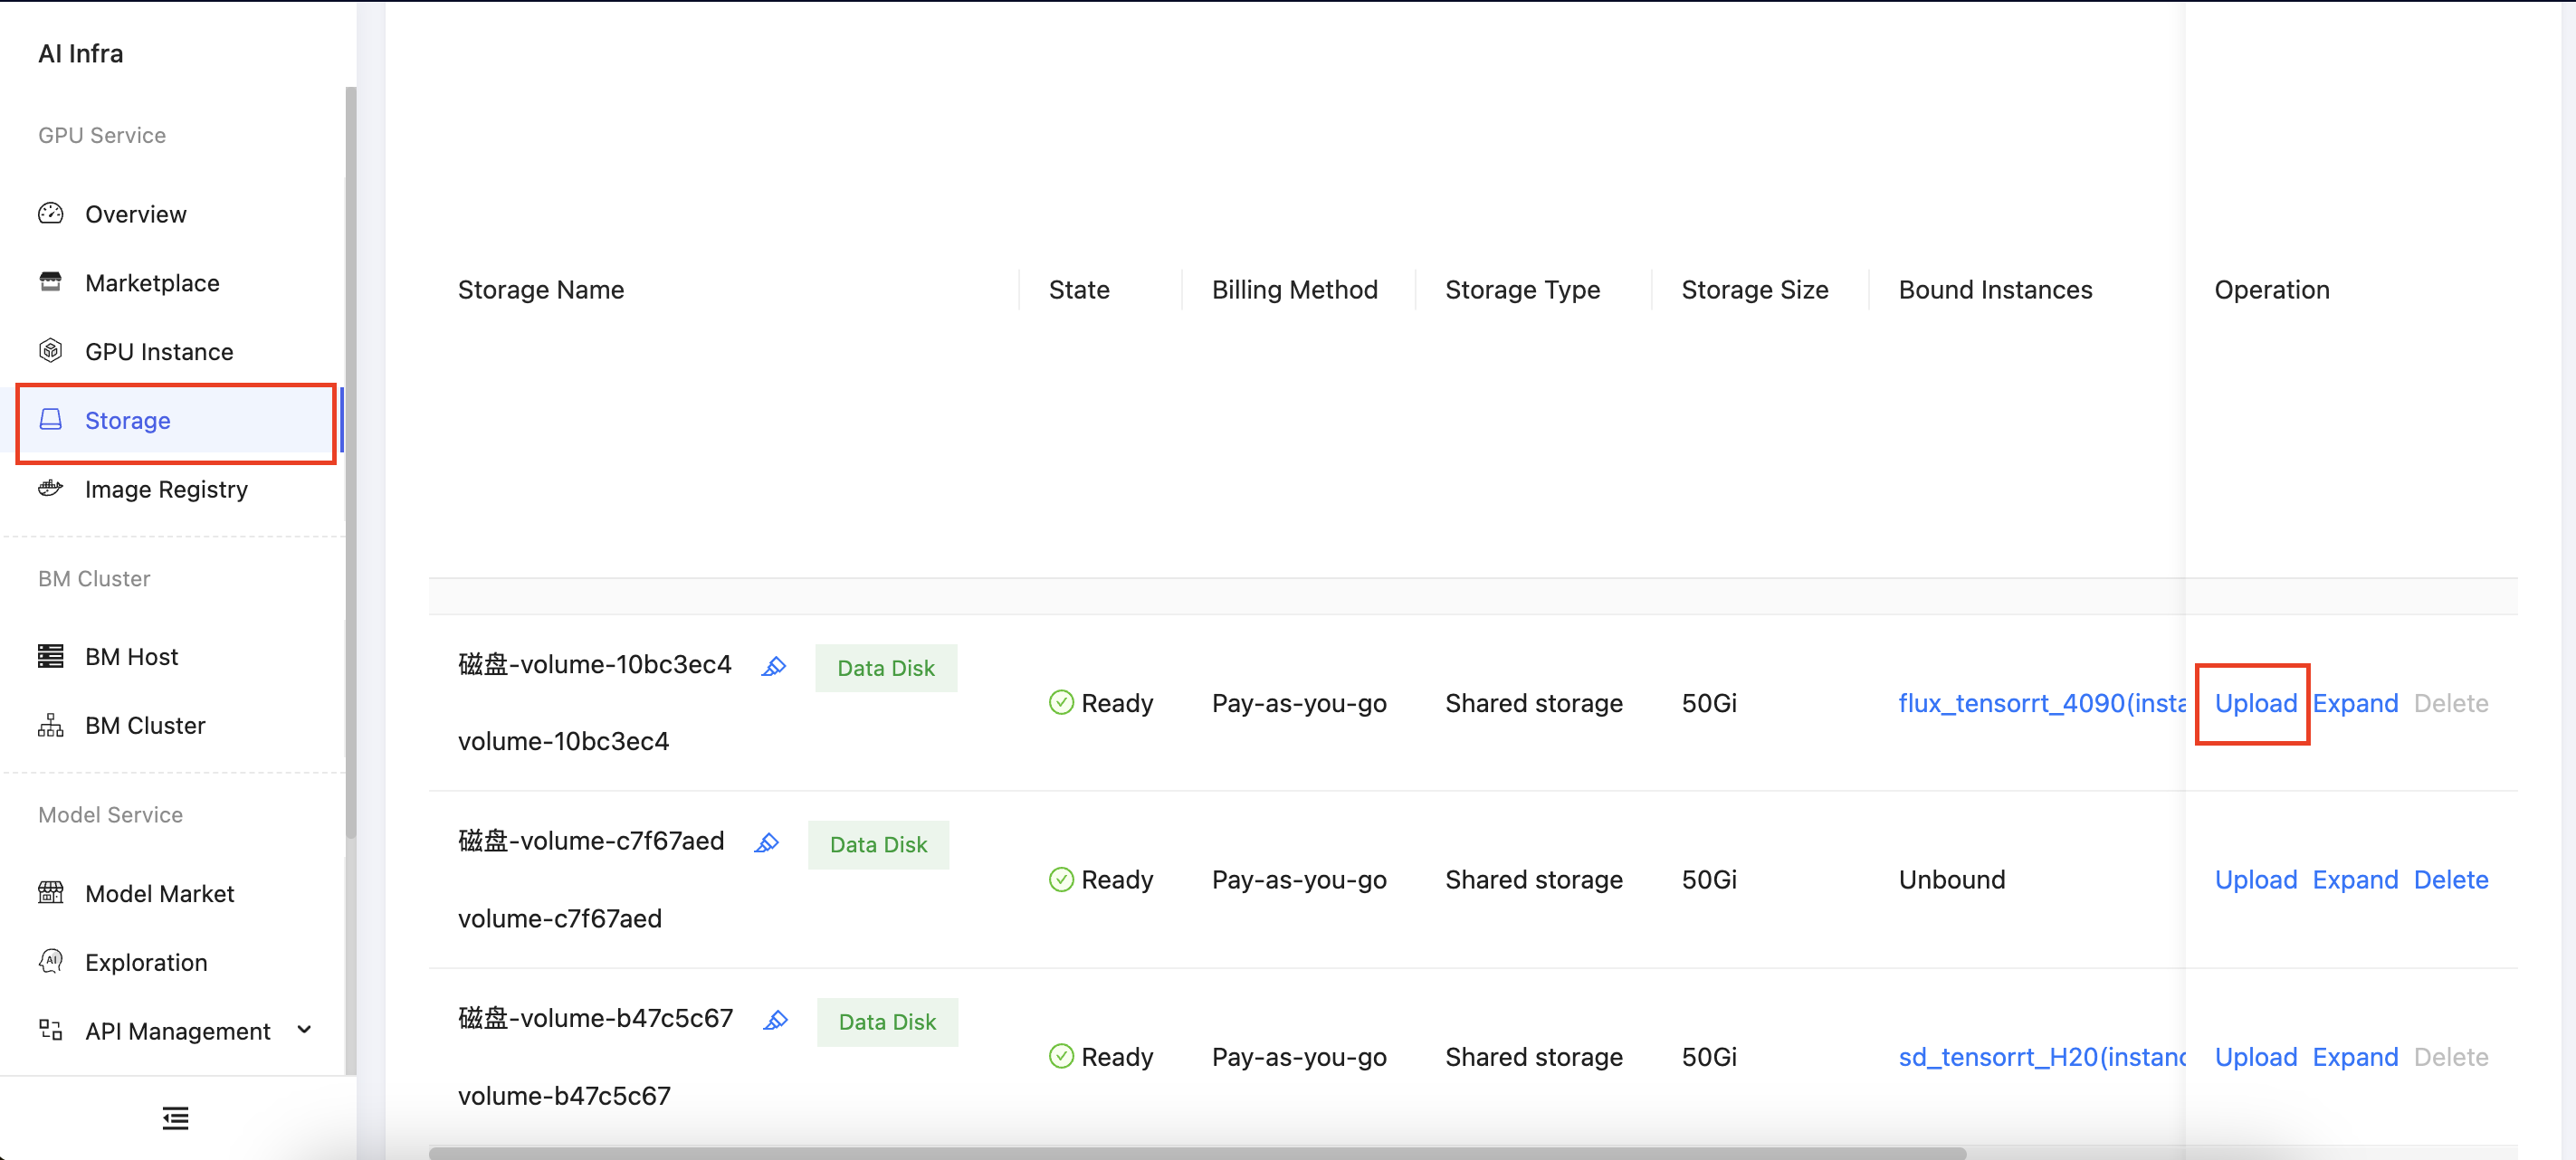
In the left sidebar, select Storage to open the storage management page. Click Upload to upload the required code or data. It is recommended to place the data disk under the /root/data path within the instance.
Standard Upload
For files smaller than 200 MiB, you can upload them by dragging and dropping or clicking to upload. Only one file can be uploaded at a time.
Large File Upload
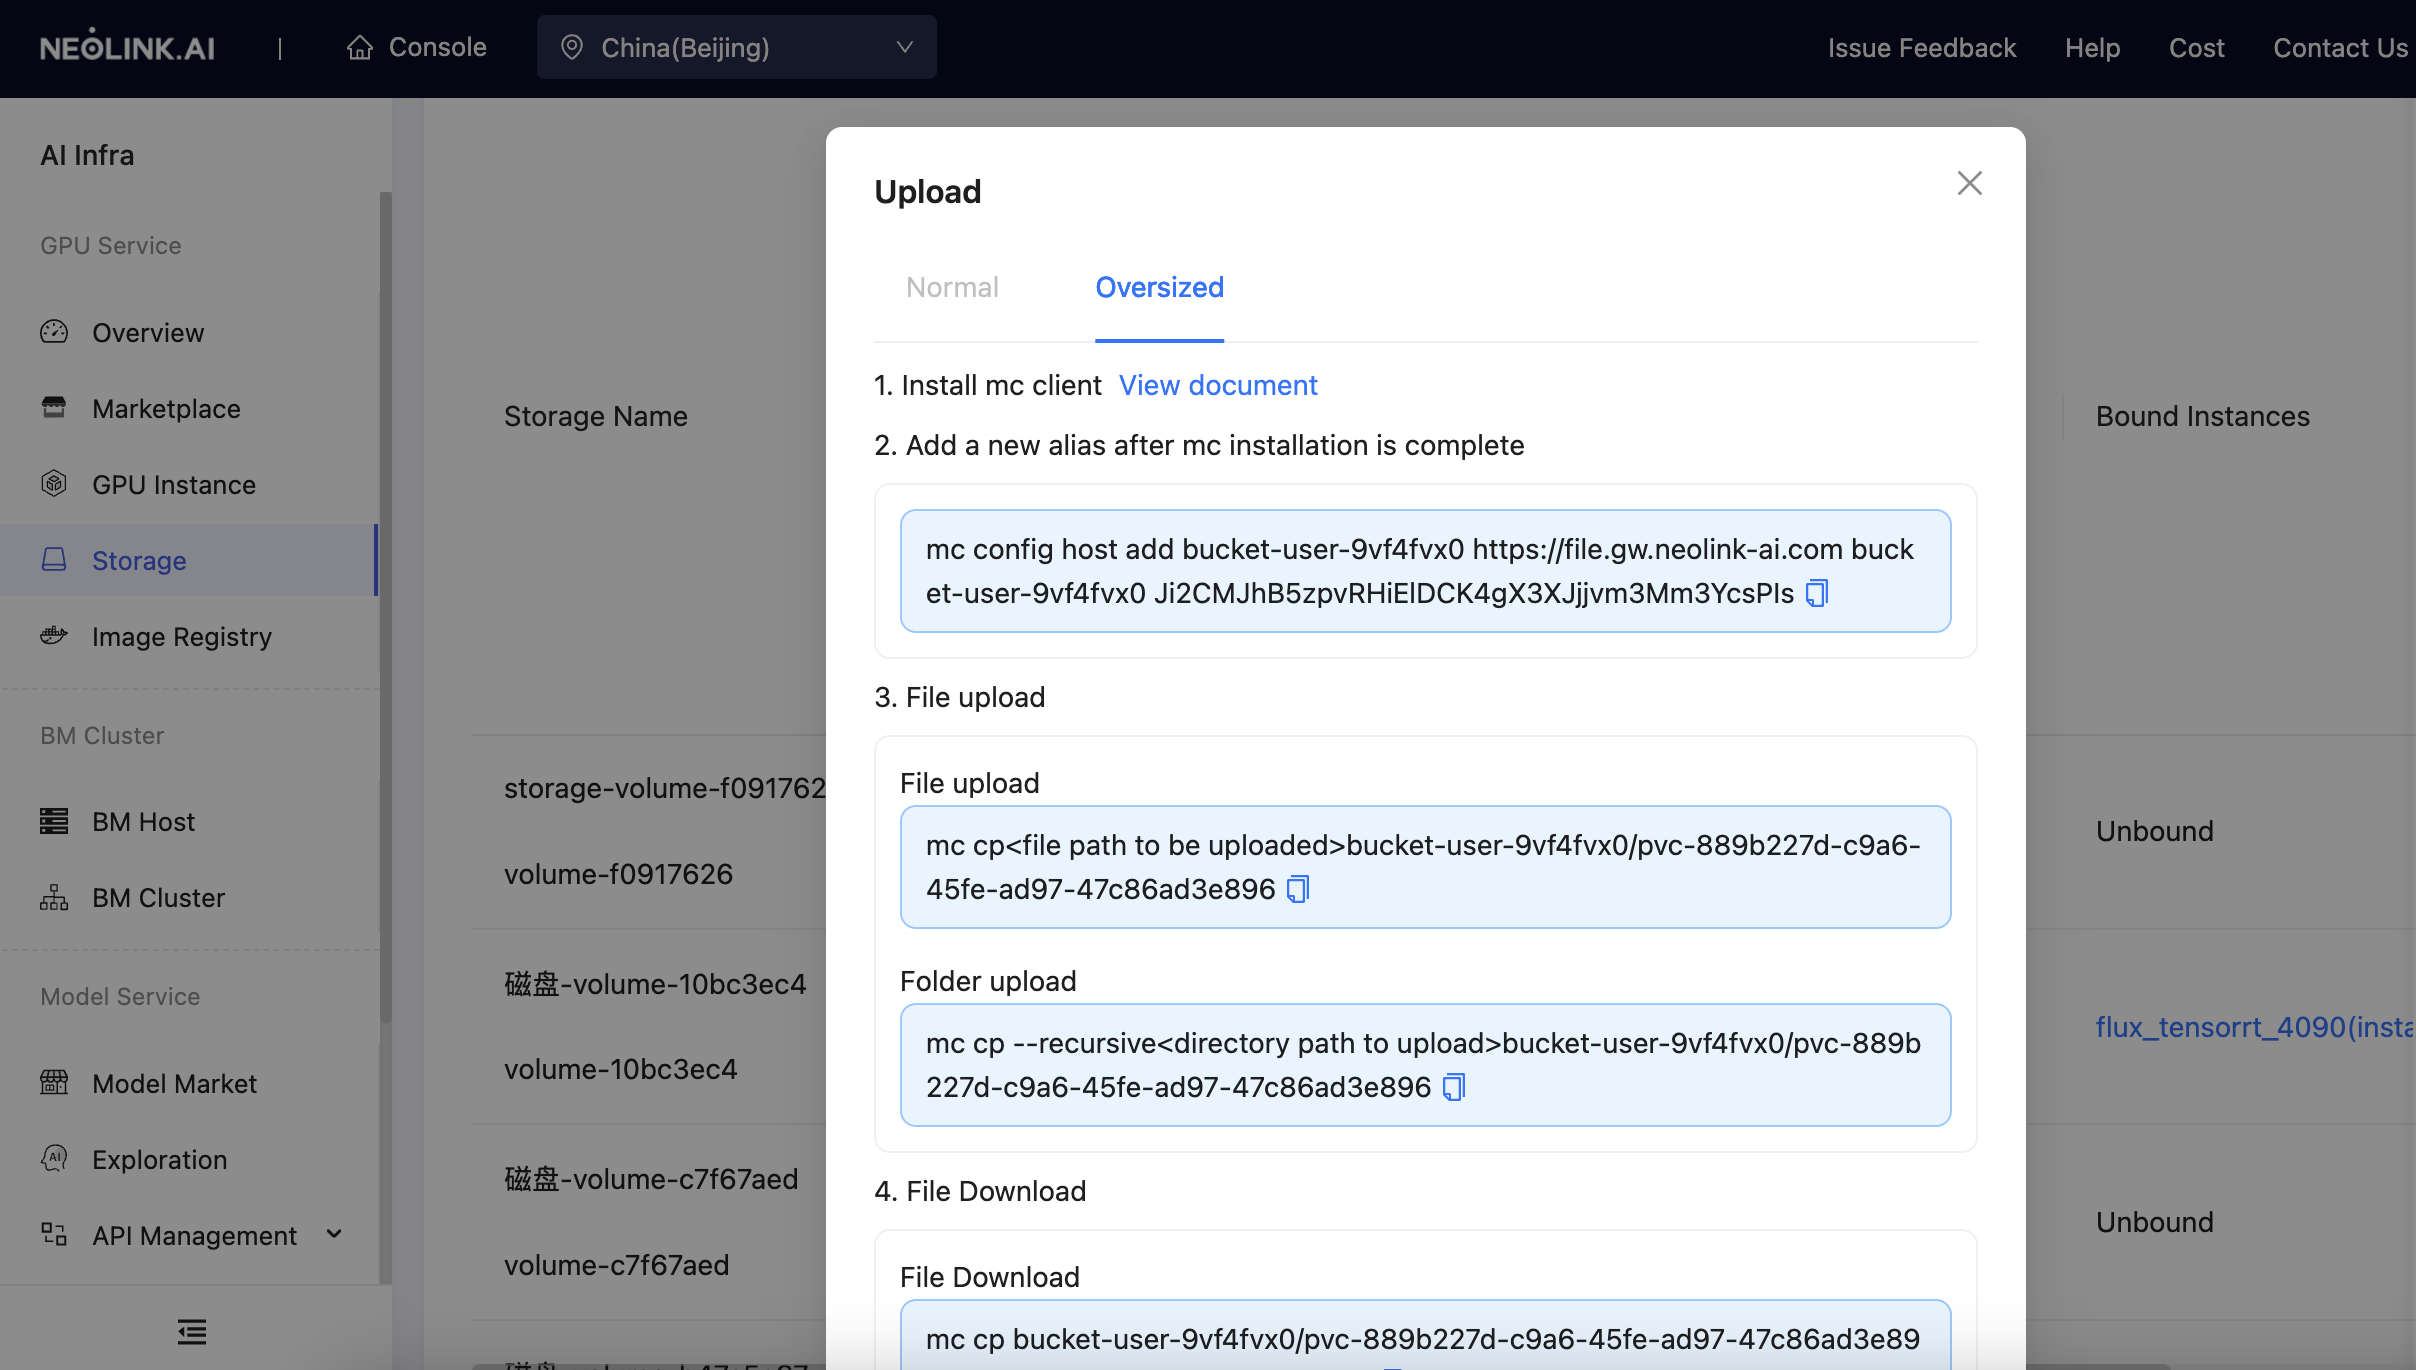
For files larger than 200 MiB, we provide a solution for large file uploads.

-
Install MinIO Client (mc)
MinIO Client (mc) is a command-line tool used to interact with MinIO and other S3-compatible storage services. The following versions are currently supported:
Below are the installation steps for some architectures. For more detailed installation instructions, please refer to the official documentation: https://min.io/docs/minio/linux/index.html
- mac-arm64
curl -O https://dl.min.io/client/mc/release/darwin-arm64/archive/mc.RELEASE.2021-04-22T17-40-00Z
chmod +x mc.RELEASE.2021-04-22T17-40-00Z
sudo mv mc.RELEASE.2021-04-22T17-40-00Z /usr/local/bin/mc
mc -version-
windows-amd64
- Click to download the binary file.
- Rename the downloaded binary file to
mc.exe. - Navigate to the directory where
mc.exeis located to execute the relevant operations. Note that in the examples, themccommand should be replaced withmc.exeon Windows.
-
linux-arm64
wget https://dl.min.io/client/mc/release/linux-arm64/archive/mc.RELEASE.2021-04-22T17-40-00Z
chmod +x mc.RELEASE.2021-04-22T17-40-00Z
sudo mv mc.RELEASE.2021-04-22T17-40-00Z /usr/local/bin/mc
mc -version -
add alias
mc config host add <bucket-name> <URL> <Access key> <Secret access key>example:
mc config host add bucket-xx https://file.gw.neolink-ai.com bucket-xx sCKPcR5HNve86pqUC7k133LD25BgSE2dAZ5zxxxx
-
upload
- upload single file
mc cp <path-to-file-to-upload> <bucket-name>/<namespace>example:
mc cp <path-to-file-to-upload> bucket-xx/pvc-35e6fa13-802a-4e93-8e55-05b13724xxxx
NOTE: The upload speed depends on the local network.
- Directory Upload
mc cp --recursive <path-to-directory-to-upload> <bucket-name>/<namespace>example:
mc cp --recursive <path-to-directory-to-upload> bucket-xx/pvc-35e6fa13-802a-4e93-8e55-05b13724xxxx -
Download
- Single File Download
mc cp <bucket-name>/<namespace>/<path-to-stored-file> <local-path>example:
mc cp bucket-xx/pvc-35e6fa13-802a-4e93-8e55-05b13724xxxx/<path-to-stored-file> <local-path>- Directory
mc cp --recursive <bucket-name>/<namespace>/<path-to-stored-directory> <local-path>example:
mc cp --recursive bucket-xx/pvc-35e6fa13-802a-4e93-8e55-05b13724xxxx/<path-to-stored-directory> <local-path>