SSH Connection
SSH (Secure Shell) is a network protocol used to securely access remote computers and services over an insecure network. It provides an encrypted communication method to ensure that data is not intercepted, tampered with, or impersonated during transmission. SSH is primarily used for remote login and command execution, but it can also be used for other applications such as file transfer (via SCP and SFTP) and port forwarding.
SSH Login
After the instance is successfully created and its status shows Running, copy the Login Command ssh.
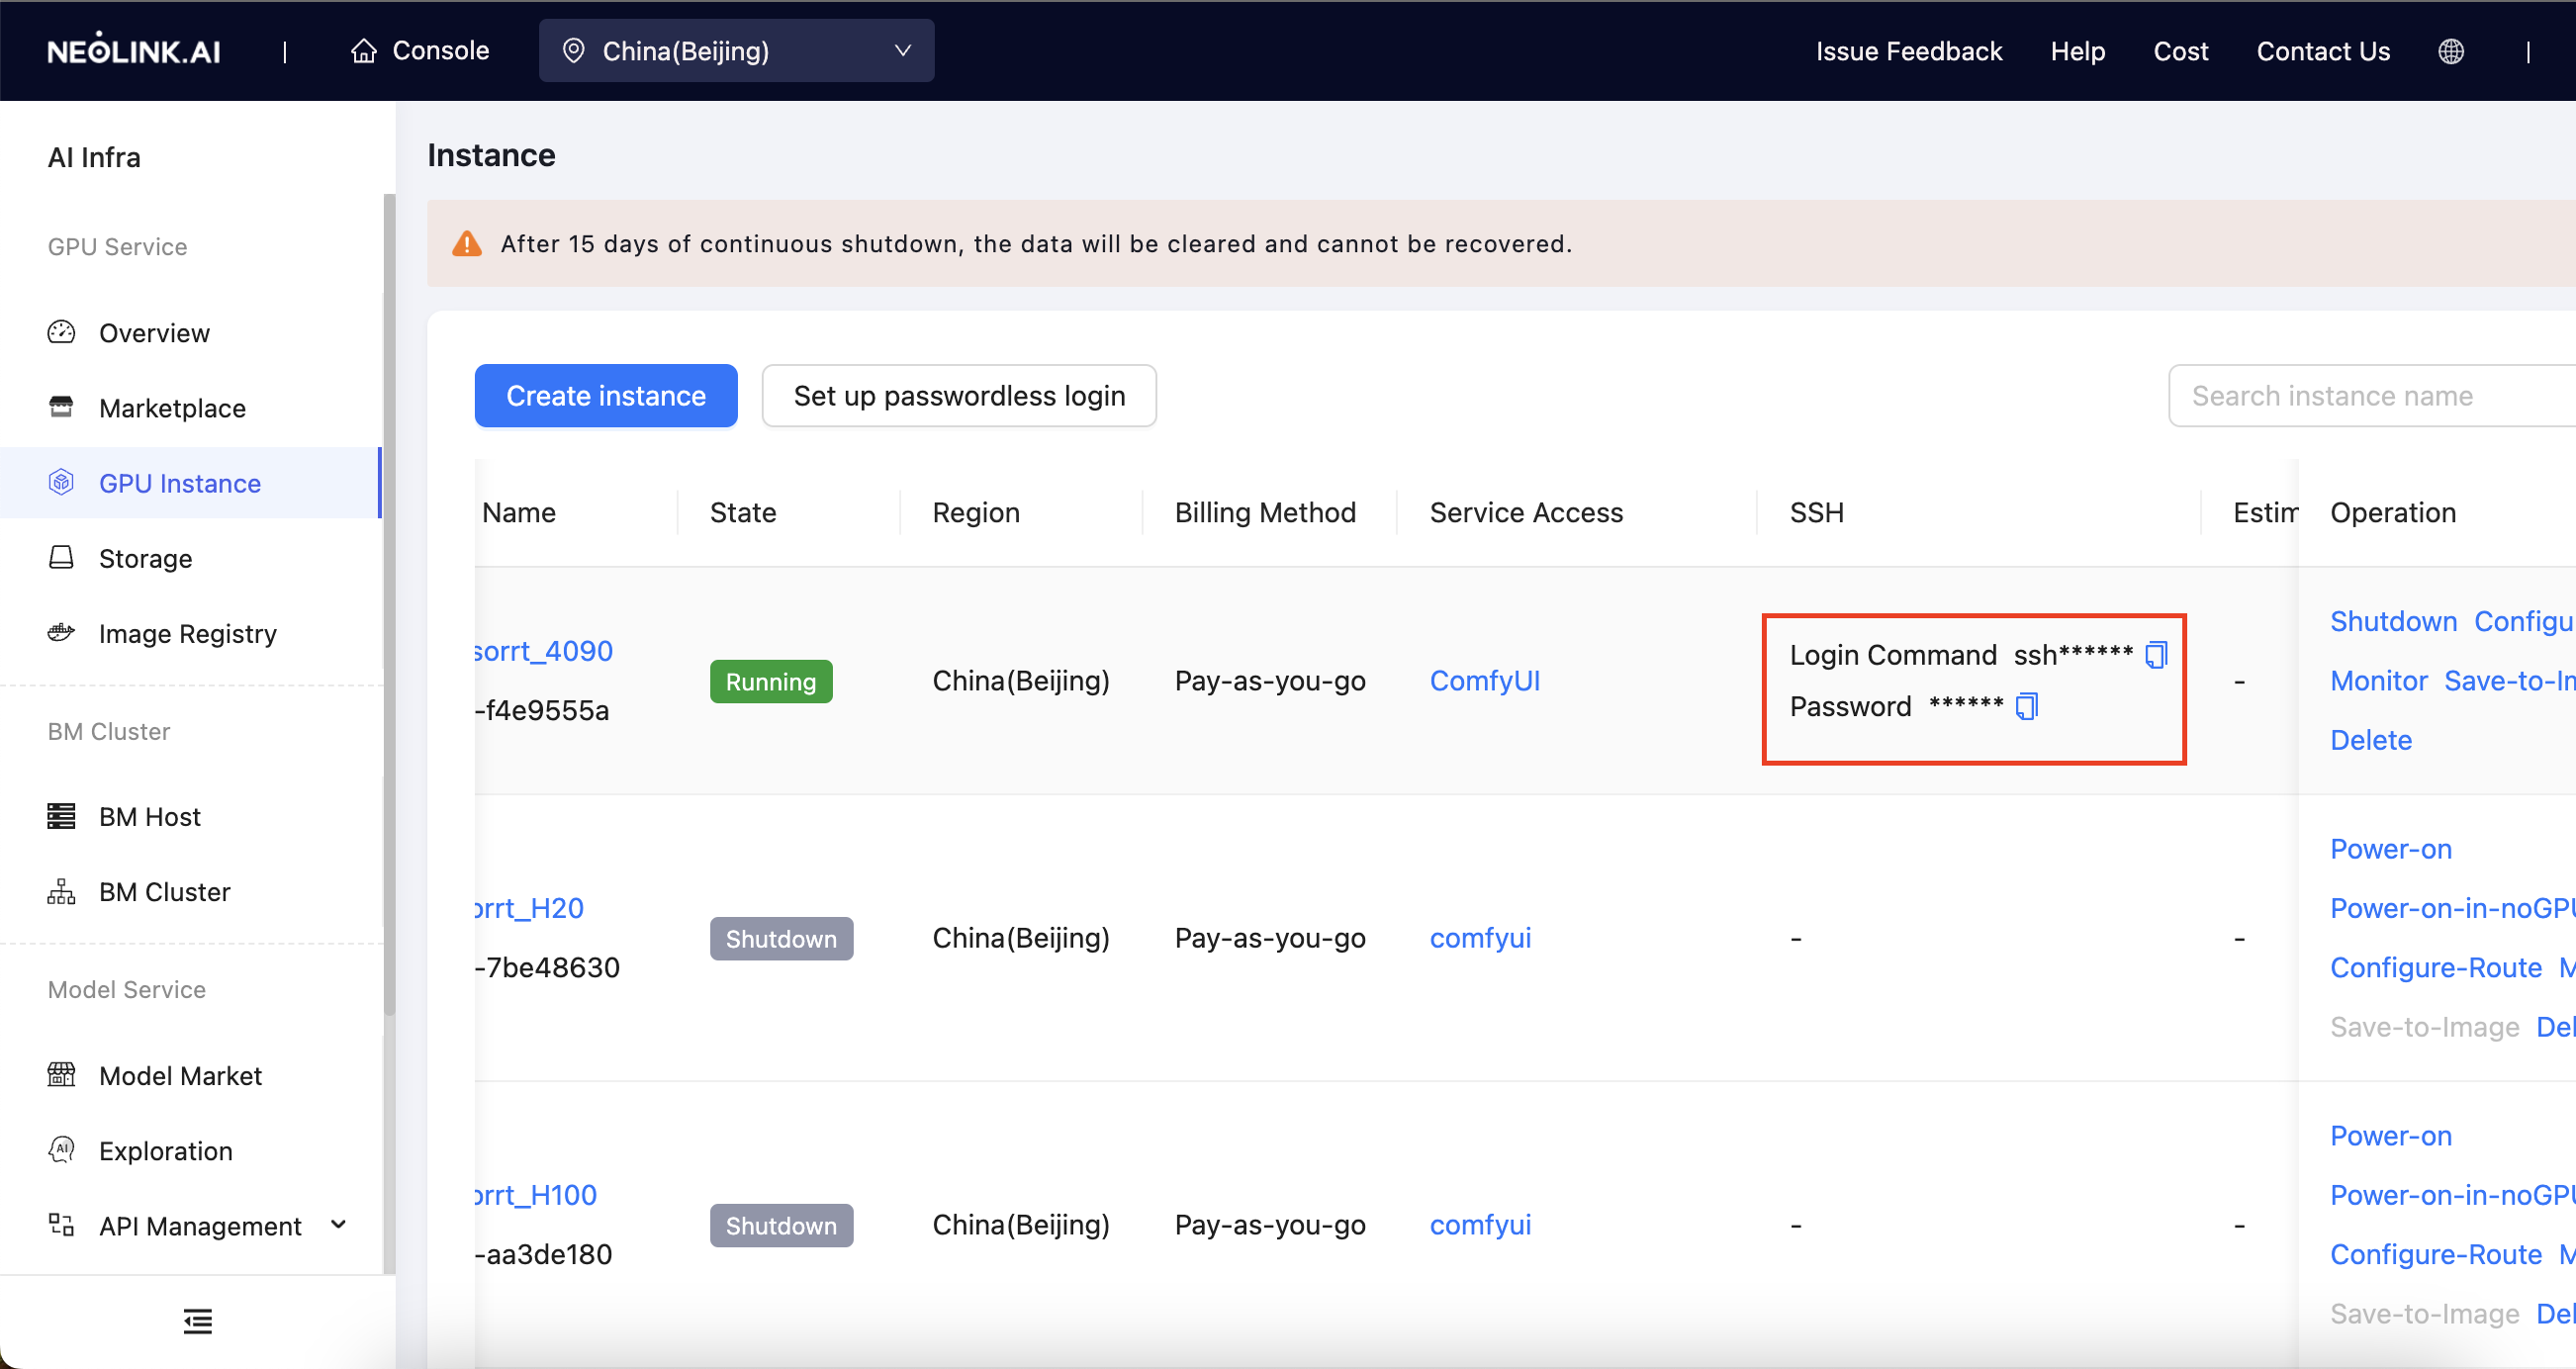
Enter the command in your local terminal, and use the copied SSH password to log in and access the compute instance.
NOTE: When connecting via SSH on a Windows system, if you encounter a Permission denied issue, please check the following:
-
Whether port 22 is open on Windows 10.
-
Press Windows key + R, type services.msc, and check whether the OpenSSH SSH Server service is enabled.
Passwordless Login
demo.cdc.datenfab.com supports configuring SSH public keys to enable passwordless login, reducing the need to copy SSH passwords and providing a more secure and reliable method of access.
How to Generate a Public Key
The method for generating a public key varies by operating system. Below are the steps for obtaining a public key on different systems. For more information on setting up a public key, please refer to the GitHub Official Documentation.
Mac
Follow these steps to generate an SSH key and add it to the SSH agent on Mac:
-
Check for existing SSH keys:
- Run the following command in the terminal to check if there are existing SSH keys:
ls -al ~/.ssh- If the
id_rsaorid_ed25519file exists, it indicates that an SSH key already exists, and you can skip the step of generating a new key.
-
Generate a New SSH Key:
- Run the following command in the terminal to generate a new SSH key, replacing
your_email@example.comwith your GitHub email address:
ssh-keygen -t ed25519 -C "your_email@example.com"- If your system does not support
ed25519, you can use thersaalgorithm:
ssh-keygen -t rsa -b 4096 -C "your_email@example.com"- When prompted to enter a file name, press
Enterto keep the default location (~/.ssh/id_ed25519or~/.ssh/id_rsa). - Set a passphrase to enhance the security of the key, or press
Enterto skip.
- Run the following command in the terminal to generate a new SSH key, replacing
-
Add the SSH Key to the SSH Agent:
- Ensure that the SSH agent is running:
eval "$(ssh-agent -s)"- Add the generated SSH private key to the SSH agent:
# If the name of your SSH public key file differs from the example code, modify the file name to match your current setup.
ssh-add --apple-use-keychain ~/.ssh/id_rsa -
Copy the SSH Key:
- Copy the SSH public key to the clipboard:
# If the name of your SSH public key file differs from the example code, modify the file name to match your current setup.
pbcopy < ~/.ssh/id_rsa.pub
Windows
To generate an SSH key and add it to the SSH agent on Windows, follow these steps:
-
Check for Existing SSH Keys:
- Run the following command in Git Bash to check if an SSH key already exists:
ls -al ~/.ssh- If the
id_rsa,id_ed25519, orid_ecdsa.pubfile exists, it indicates that an SSH key already exists, and you can skip the step of generating a new key.
-
Generate a New SSH Key:
- Run the following command in Git Bash to generate a new SSH key, replacing
your_email@example.comwith your GitHub email address:
ssh-keygen -t ed25519 -C "your_email@example.com"- If your system does not support
ed25519, you can use thersaalgorithm:
ssh-keygen -t rsa -b 4096 -C "your_email@example.com"- When prompted to enter a file name, press
Enterto keep the default location (~/.ssh/id_ed25519or~/.ssh/id_rsa). - Set a passphrase to enhance the security of the key, or press
Enterto skip.
- Run the following command in Git Bash to generate a new SSH key, replacing
-
Add the SSH Key to the SSH Agent:
- Ensure that the SSH agent is running:
Get-Service -Name ssh-agent | Set-Service -StartupType Manual
Start-Service ssh-agent- Add the generated SSH private key to the SSH agent:
# If the name of your SSH public key file differs from the example code, modify the file name to match your current setup.
ssh-add --apple-use-keychain ~/.ssh/id_rsa -
Copy the SSH Key:
Copy the SSH public key to the clipboard:
# If the name of your SSH public key file differs from the example code, modify the file name to match your current setup.
clip < ~/.ssh/id_rsa.pub
Linux
Follow these steps to generate an SSH key and add it to the SSH agent on Linux:
-
Check for Existing SSH Keys:
- Run the following command in Git Bash to check if an SSH key already exists:
ls -al ~/.ssh- If the
id_rsa,id_ed25519, orid_ecdsa.pubfile exists, it indicates that an SSH key already exists, and you can skip the step of generating a new key.
-
Generate a New SSH Key:
- Run the following command in Git Bash to generate a new SSH key, replacing
your_email@example.comwith your GitHub email address:
ssh-keygen -t ed25519 -C "your_email@example.com"- If your system does not support
ed25519, you can use thersaalgorithm:
ssh-keygen -t rsa -b 4096 -C "your_email@example.com"- When prompted to enter a file name, press
Enterto keep the default location (~/.ssh/id_ed25519or~/.ssh/id_rsa). - Set a passphrase to enhance the security of the key, or press
Enterto skip.
- Run the following command in Git Bash to generate a new SSH key, replacing
-
Add the SSH Key to the SSH Agent:
- Ensure that the SSH agent is running:
eval "$(ssh-agent -s)"- Add the generated SSH private key to the SSH agent:
# If the name of your SSH public key file differs from the example code, modify the file name to match your current setup.
ssh-add --apple-use-keychain ~/.ssh/id_ed25519 -
Copy the SSH Key:
Copy the SSH public key to the clipboard:
# If the name of your SSH public key file differs from the example code, modify the file name to match your current setup.
cat ~/.ssh/id_ed25519.pub
When copying the key, do not add any line breaks or spaces.
Set Up Key-Based Login
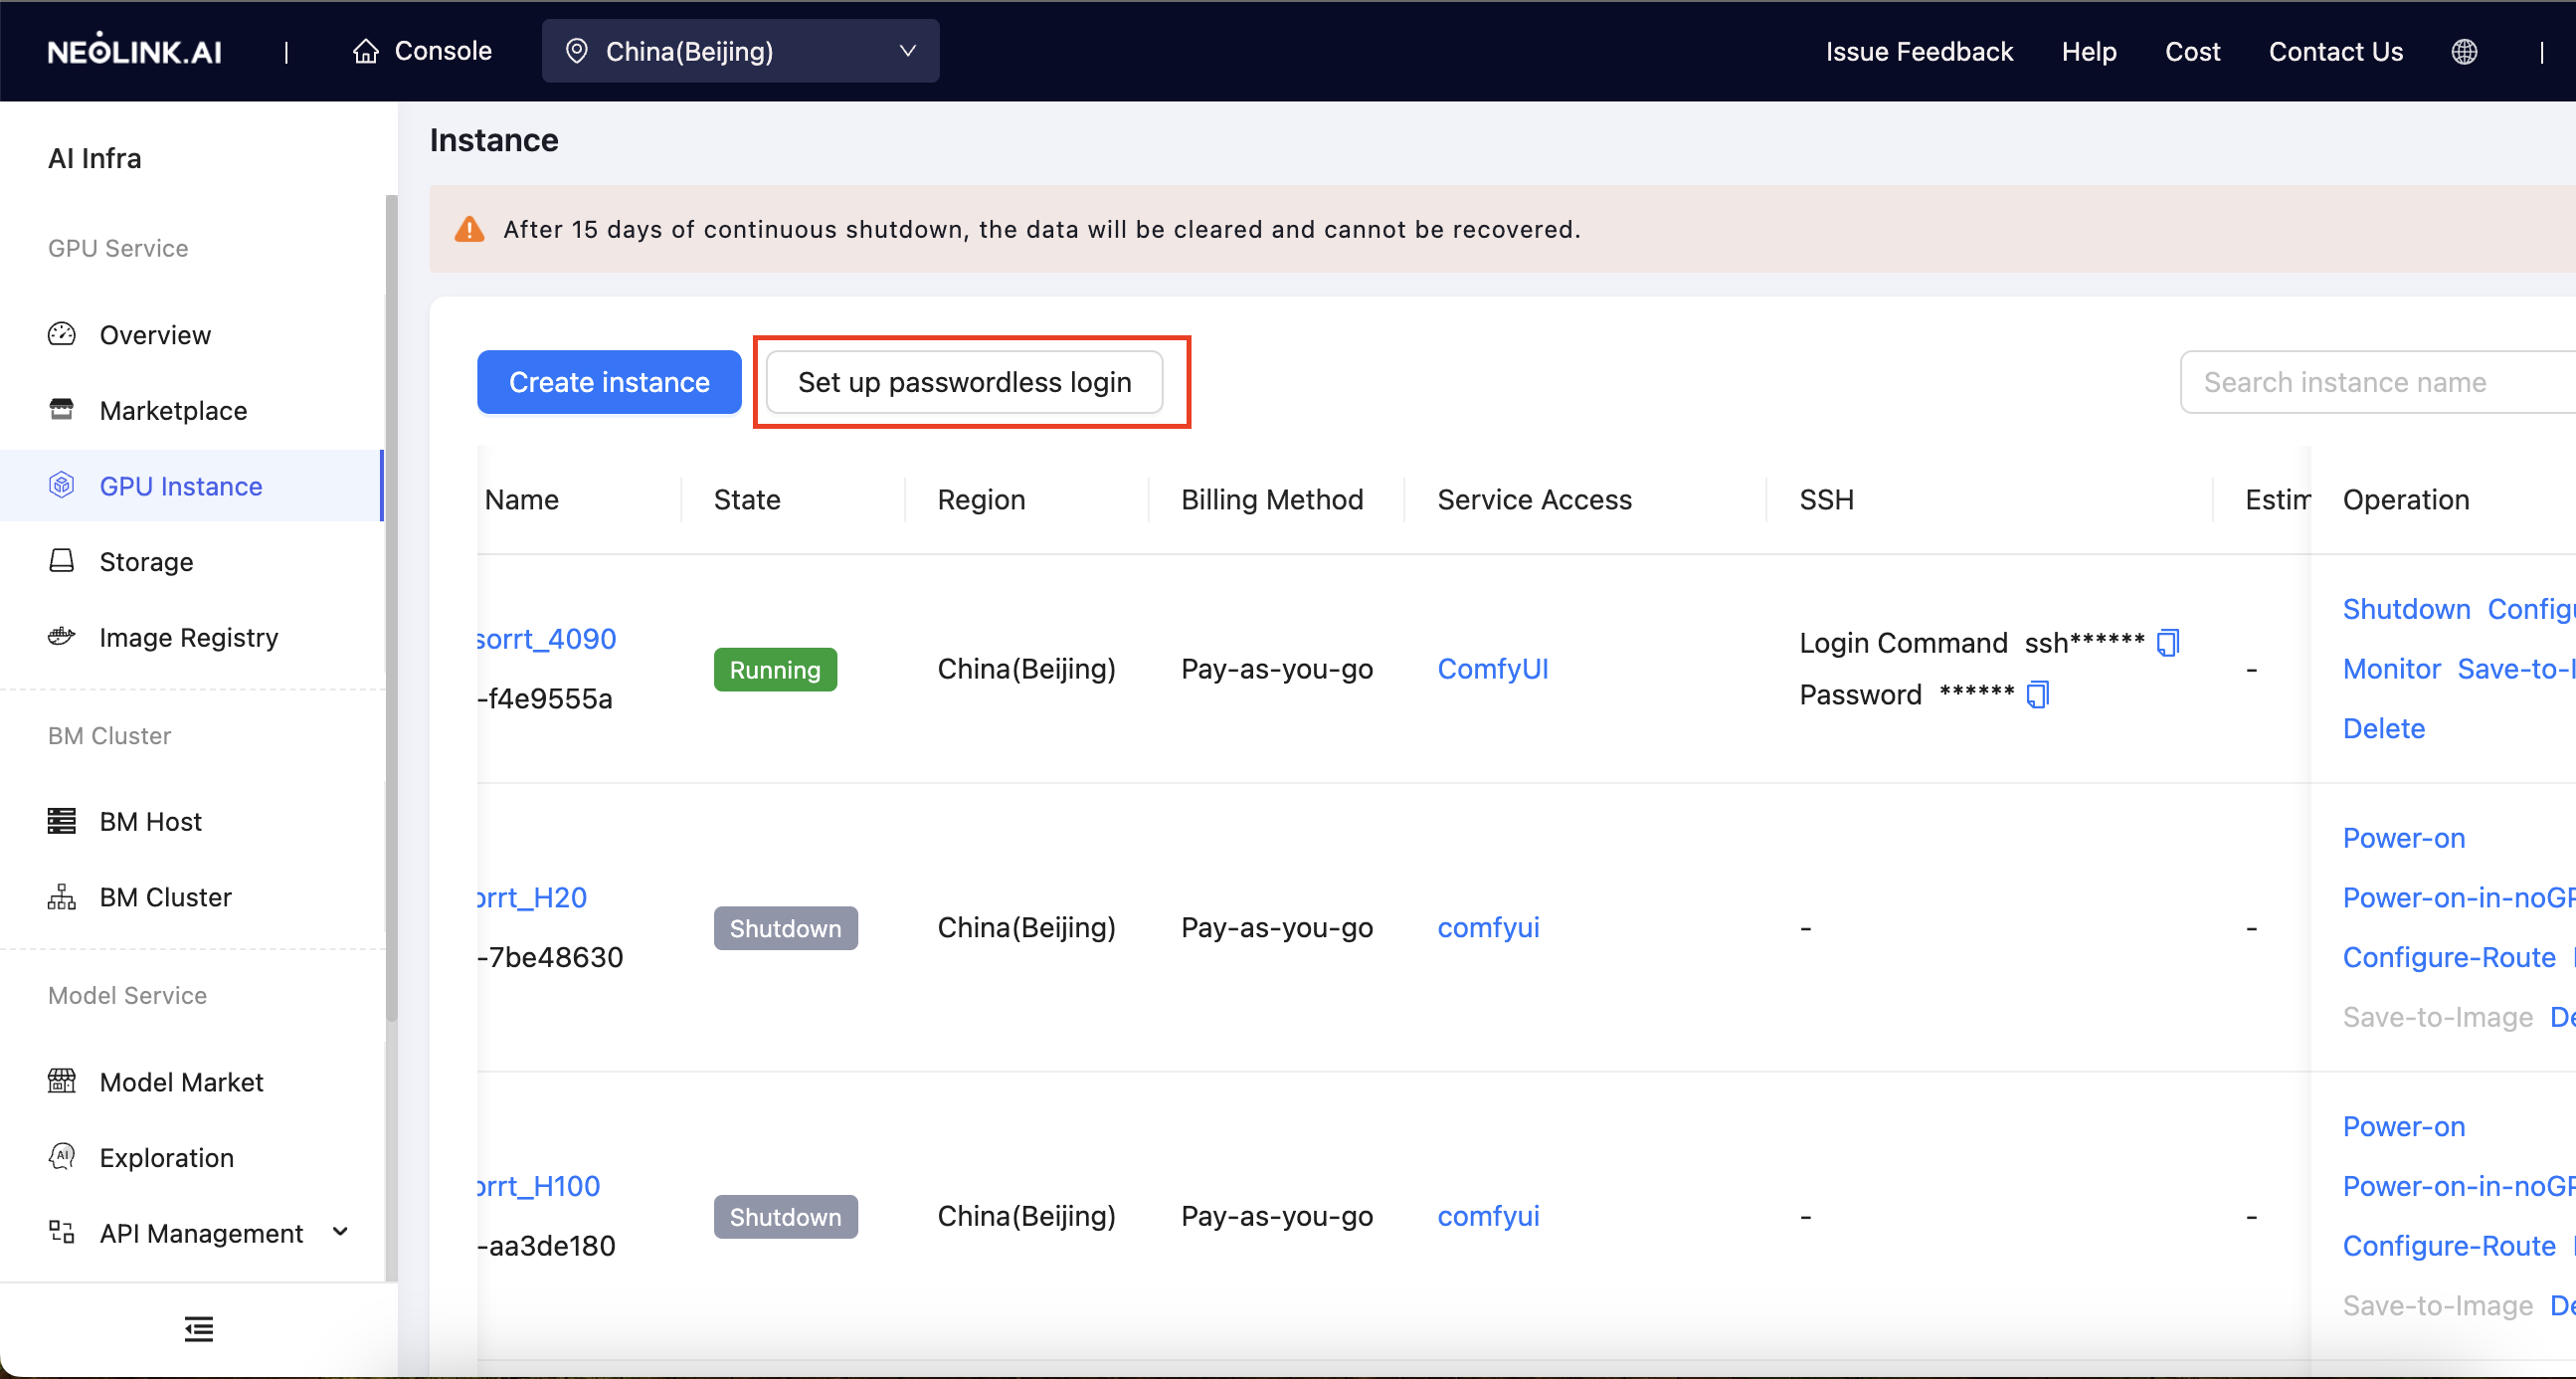
In the instance list, click Set up passwordless login to access the SSH public key configuration page.
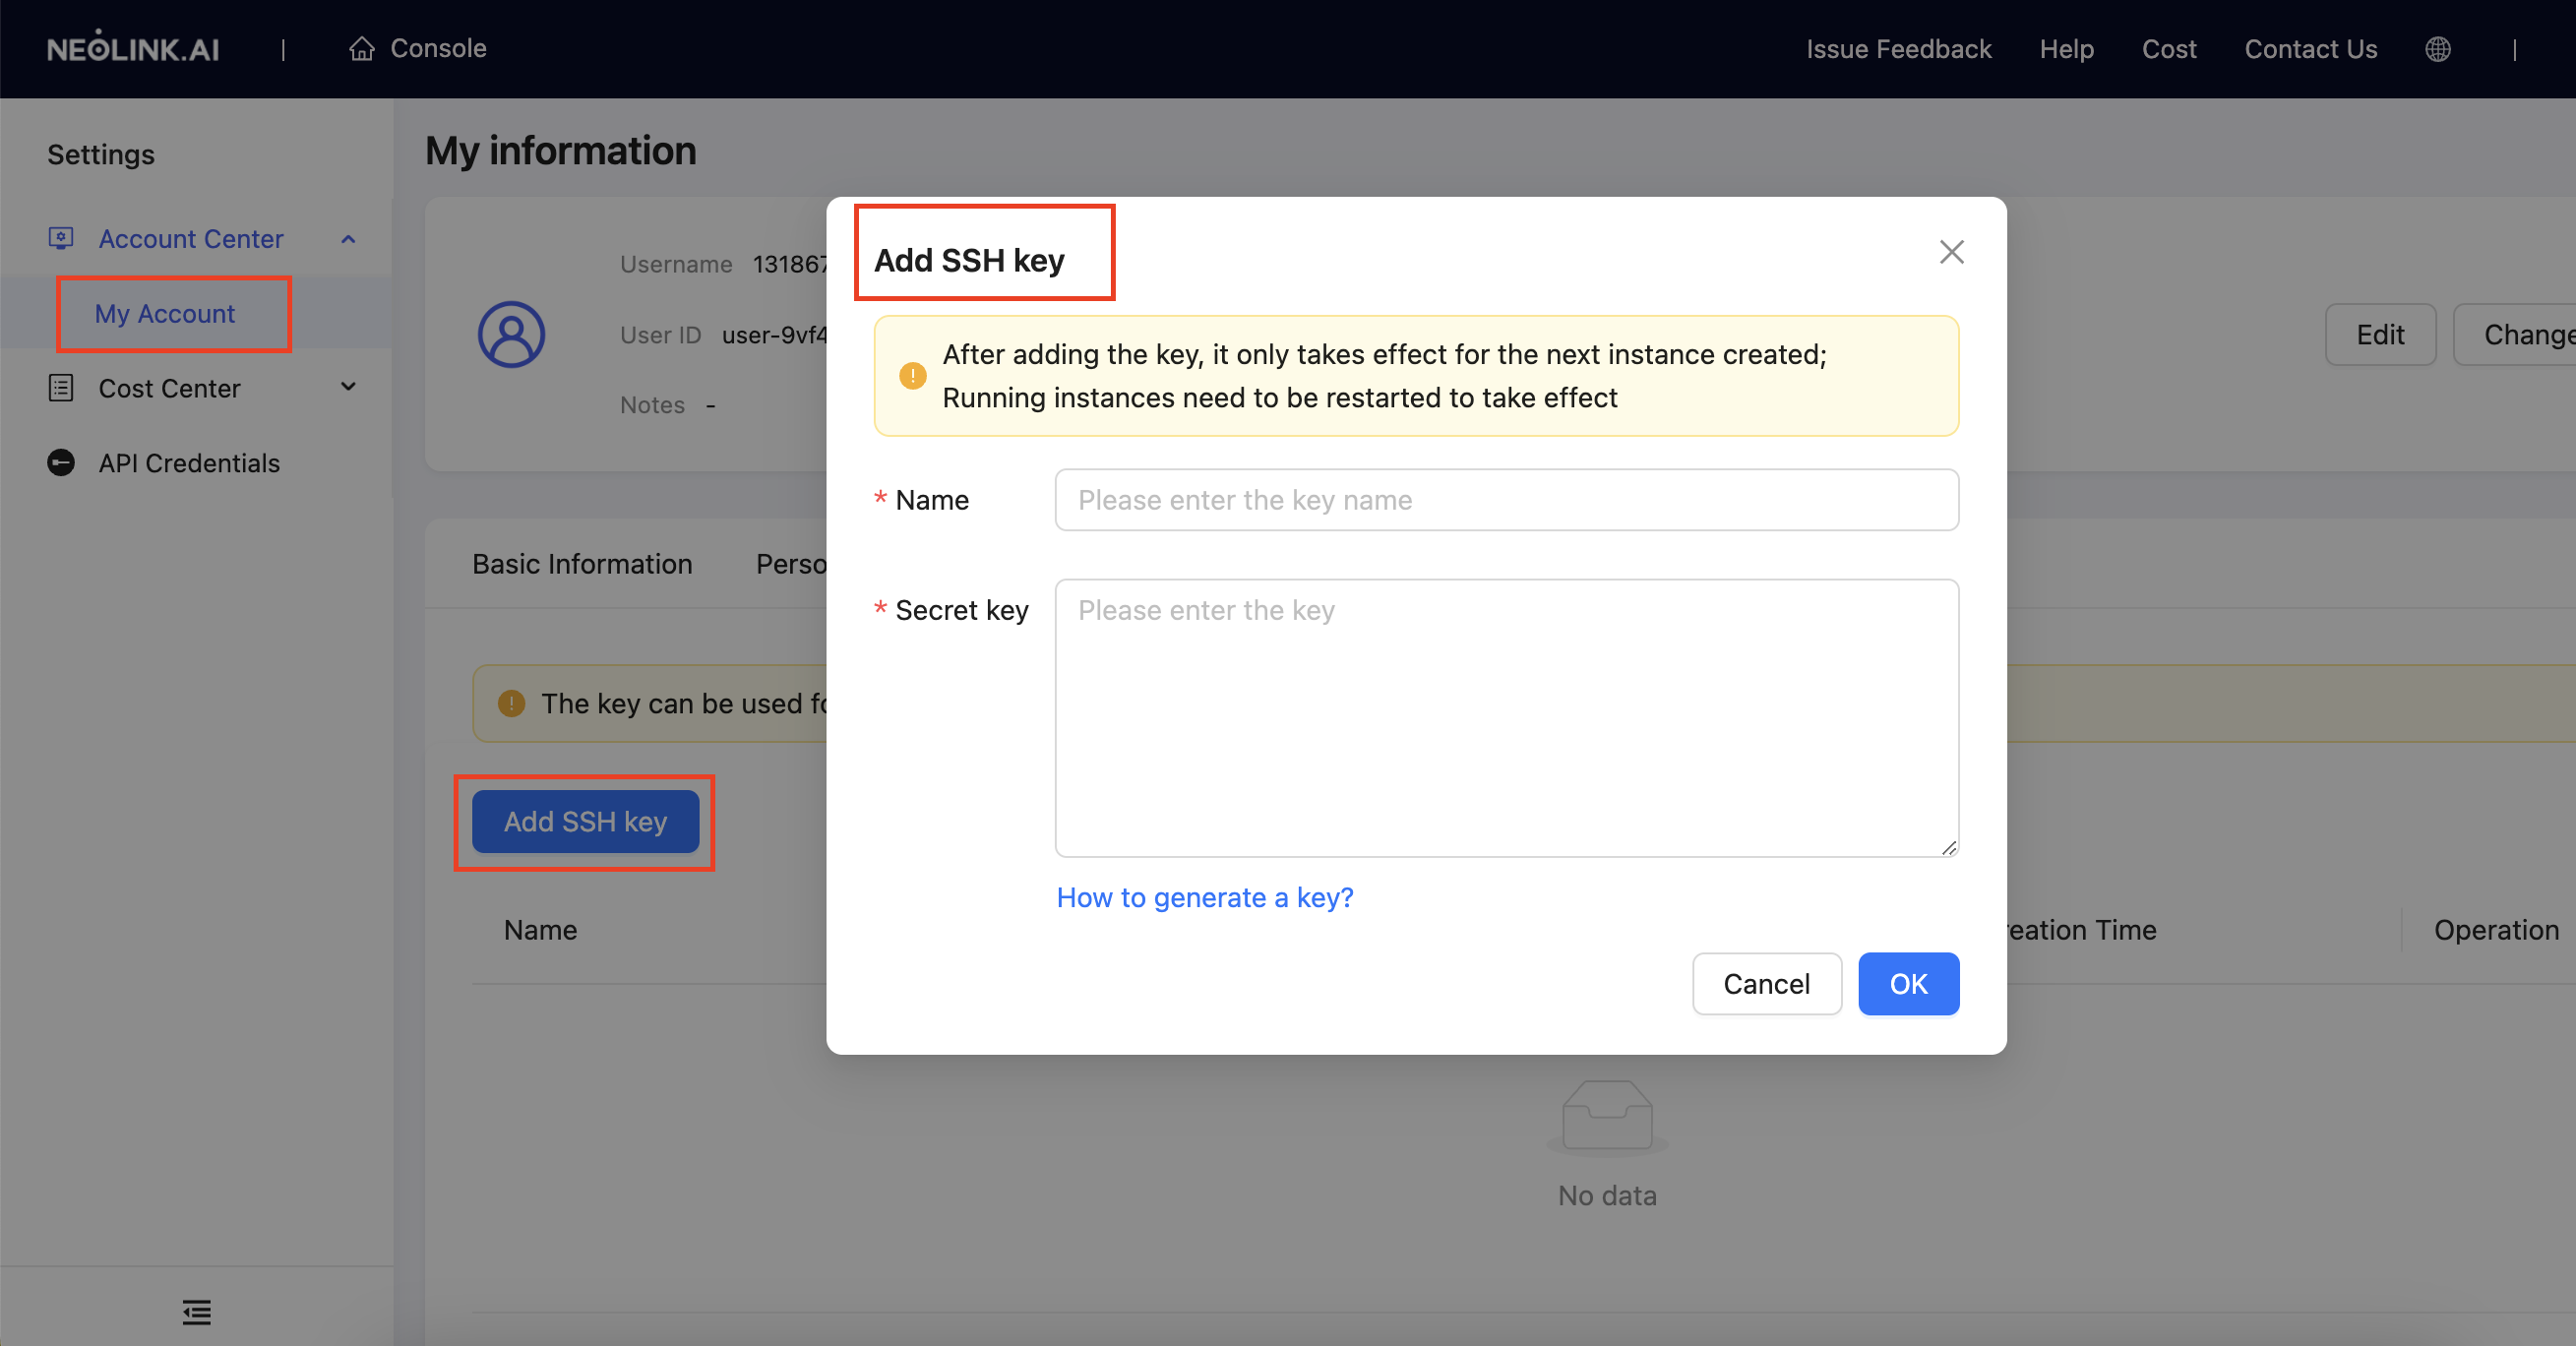
On the SSH public key configuration page, click Add SSH Key. In the pop-up window, enter the key name and public key, then click OK. Once added, the public key will only apply to newly created instances. For running instances, you need to shut them down first before enabling passwordless login.
Now, you can use the provided login command to log in without a password.